Creating an account
Creating an email account in Gmail
You have a wide selection of free email providers. Google owns the web-based email account service Gmail. This email account is quite popular and is straightforward, contemporary, and easy to use. For demonstration purposes, we selected this email provider for this reason.
You need a computer with an internet connection and a web browser installed in order to access Gmail.
STEP 1: Open your browser installed on your computer and type on the address bar gmail.com
STEP 2: Click on “Create new account”
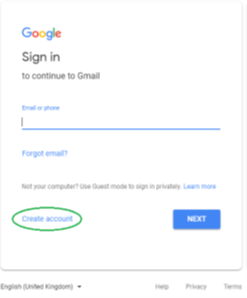
Figure 1: Creating an account (source: https://edu.gcfglobal.org/en/tr_el-gmail/)
STEP 3: Enter your own name (first name and last name – using a nickname is also an option, but if you use this email to represent yourself as a public person it would be better for you to use your real name). Then enter a username which will appear to everyone who receives an email from you and will be used as your email address (this username can include letters, numbers and periods). Enter your password (you need to enter the password 2 times) – as shown in the picture.
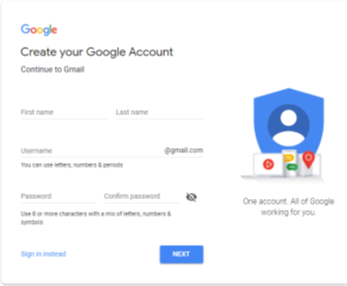
Figure 2: Fill in the signup form
Click NEXT
For more information about password, see module 3 “Safety online”
STEP 4: Now enter your phone number (this is optional but this can improve the security), another email address (this is also optional), date of birth (you don’t have to enter your real date of birth) and gender (as shown on the picture).
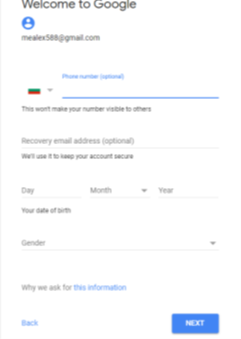
Figure 3: Insert additional information.
Click NEXT
STEP 5: A Privacy and Terms window will appear. First, read the terms and conditions before scrolling down with the mouse to the end of the field and tick the two boxes.
STEP 6: Click CREATE ACCOUNT
Background Colour
Font Face
Font Size
Text Colour